
My Gear
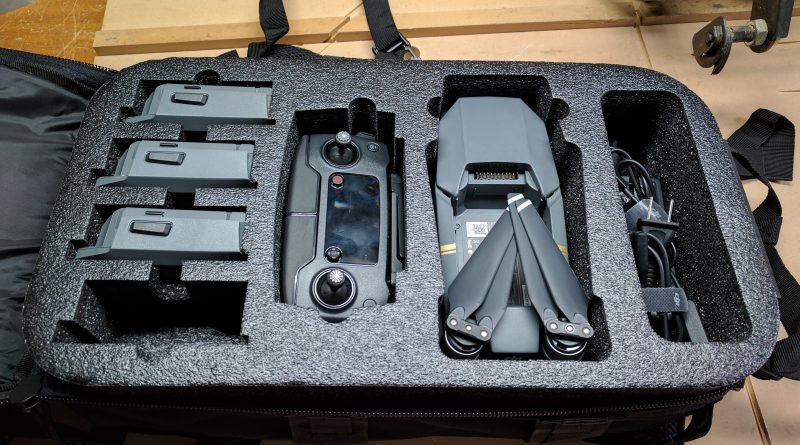
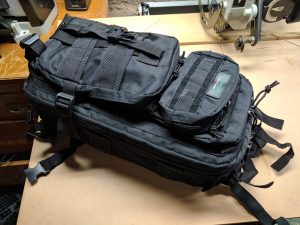
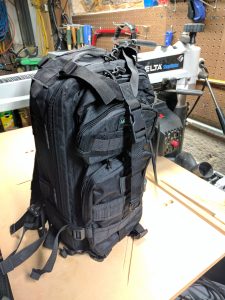
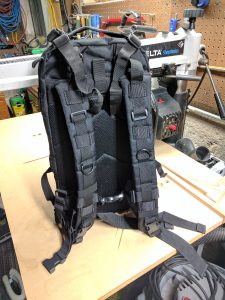
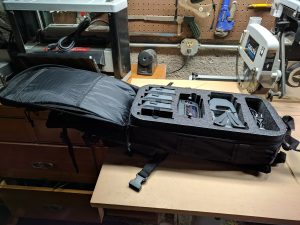
 As I said on another page, the bag that comes included with the DJI Mavic Fly More Combo does not have enough room for my needs. As a result, I decided to look for a third party case. My goals were ultimate portability combined with the best protection possible. I am extremely pleased with the Microraptor Pro backpack. It has custom foam cutouts to safely and securely hold the Mavic, remote, charger, accesssories, and up to four batteries. The backpack is extremely well-made and I was able to fit everything including the car charger, phone, filters, etc and still have room for more.
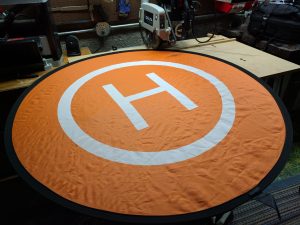
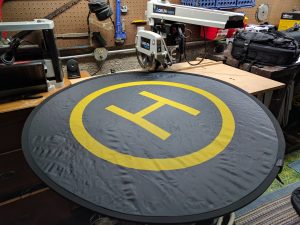
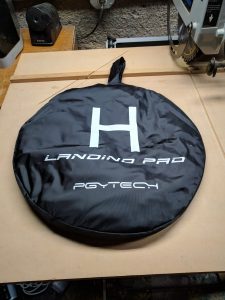 On each takeoff, the Mavic first determines its GPS location before it will fly. This takes about 10-15 seconds to lock in. Once this occurs, the remote will let you know that it’s ready to fly. When the drone lifts off, it takes a picture of the spot it took off from. It is suggested that the takeoff/landing area be one of high contrast. To allow for this, and also to keep dust/debris from getting sucked into the propellers/camera I decided to pick up a landing pad. I chose the PGYTech landing pad because it has good reviews like everything else I carry, it is foldable. It has a black/yellow side as well as a white/orange side as shown in the photos below. It folds easily with a little practice. It folds in the same manner that one would fold a bandsaw blade. To describe this process, envision the landing pad being a clock. I grab the pad with my hands in the 4 and 8 o’clock positions, then simply fold inward, crossing one hand over the other. The approximately 3 foot diameter landing pad folds into a circle about one foot in diameter for compact storage. It is made of nylon and easy to clean with soap and water.
Taco-RC Snap on Multi-Coating ND Filters
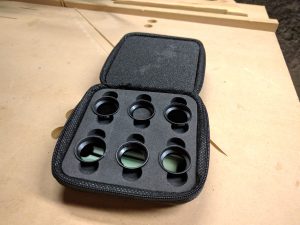 Prior to starting aerial photography, I read many experienced photographers claim that a good set of ND filters is essential in order to get the best photo and video quality. Think of ND filters as sunglasses for the camera. Selecting the proper filter helps achieve perfect exposure no matter the lighting conditions. There are several manufacturers of ND filters for the Mavic. I chose Taco-RC filters because I read positive reviews, but the real selling point of these filters is the ability to leave them on the camera indefinitely without the fear of interfering with gimbal calibration. When the Mavic initializes, the gimbal does a ‘dance’ and quickly calibrates itself by going through its complete range of motion to determine the horizon and balance itself. Several other brands of filters (even the ones that cost twice as much) weigh too much and cause gimbal errors if installed prior to calibration. If you install a filter after calibration, the gimbal motor thinks the camera is being pushed off balance and ‘fights’ you. The gimbal is very delicate and I can’t imagine it’s a good thing to push on it after it’s initialized. For this reason alone, I selected Taco-RC filters. The first time I used them was during my Jim Thorpe panorama shoot in January. I’m very pleased with the quality.